
A Guide to the NVIDIA GauGAN Fill/Brush in 2026

Matic Pogladič
05 April 2026
The NVIDIA GauGAN fill and brush are your core creative instruments. Use the fill bucket to apply a base material like ‘sky’ or ‘grass’ across a large area, then use the paintbrush to add specific details like mountains or rivers. This two-step process allows you to quickly build a scene and then refine it with precision. Simply select a material, paint a shape, and the AI generates a photorealistic image from your instructions.
So what is the magic behind turning a simple colored blob into a detailed mountain range? The technology is built on a generative adversarial network, or GAN. Think of it as two AIs working in concert.
One AI, the "generator," takes your rough sketch, what's technically called a segmentation map, and tries its best to create a realistic image from it. The second AI, the "discriminator," acts as an art critic. It has been trained on a massive library of real-world photographs, and its only job is to judge whether the generator's work looks fake or real. This constant back-and-forth pushes the generator to get better and better, turning your simple inputs into something remarkably lifelike. You are not just drawing. You are directing a creative process.
When GauGAN first appeared back in 2019, it was genuinely revolutionary. For the first time, you did not need to be a coder or a 3D artist to generate stunning scenes. All you needed was a basic idea and a few clicks. It democratized a very complex form of AI creation.
The response was immediate and overwhelming. In just its first month, users generated over 500,000 images, from professional concept artists roughing out ideas to hobbyists just having fun. GauGAN's impact was solidified when it won both 'Best of Show' and 'Audience Choice' at the SIGGRAPH 2019 Real-Time Live competition.
This explosion in popularity sent a clear message: people wanted intuitive ways to collaborate with AI. It showed that the future was not just about more powerful software, but about more accessible creative partnerships. If you're interested in exploring this space further, our guides on AI art generation cover many of the tools that followed in GauGAN's footsteps.
Getting to Grips with the GauGAN Workspace
Jumping into NVIDIA GauGAN for the first time feels a bit like magic. The whole workspace is built around a beautifully simple concept that gives you an incredible amount of creative power. Fast.
The interface is split right down the middle. On one side, you have your segmentation map. This is your canvas. Instead of painting with colors, you are painting with ideas: "sky here," "water there." On the other side, you see the AI's real-time interpretation, a photorealistic image that updates with every brushstroke. This instant feedback makes GauGAN so addictive.
Your Core Toolkit: The Material Palette
The heart of your control panel is the material palette. This is where you will find all the building blocks for your scene. You just pick a label and start painting on your map.
- Terrain: Lay down the groundwork with labels like rock, sand, grass, and dirt.
- Water: Create oceans, lakes, and rivers using the sea and river brushes.
- Atmosphere: Define your sky with clouds or a clear sky label for the perfect backdrop.
This is where you can really start experimenting. If you want to push your creations even further, you can find more advanced techniques in our guides to image editing.
I remember my first attempt at a complex shoreline vividly. It was a complete disaster. A blurry, incoherent mess where the sand and water just bled into each other.
It is the classic beginner mistake. I had sloppily overlapped the 'sand' and 'sea' labels, which completely confused the AI. The key is to paint clean, distinct boundaries on your segmentation map. The AI needs clear instructions to render those sharp, realistic details that make an image pop.
Think of it this way: your map is the blueprint, and the AI is the contractor. Give it a messy, smudged blueprint, and you will get a shoddy result. A clean, well-defined map is the foundation for a crisp, believable final image. Getting this right from the start will save you a ton of frustration.
Creating Your First AI Landscape Scene
Alright, let's get our hands dirty and paint your first scene. We will start from a blank canvas and build a simple but impressive landscape. The goal here is to build your confidence by showing you just how intuitive this process can be. Feel free to follow along in real time.
First, we will lay down the broad strokes with the fill tool. Think of this as priming your canvas. Go to the material palette, find sky, and click anywhere in the top half of the segmentation map. Instantly, the AI generates a believable sky. Next, grab the grass material and fill the bottom half. Just like that, you have established a horizon line. This is a simple workflow.
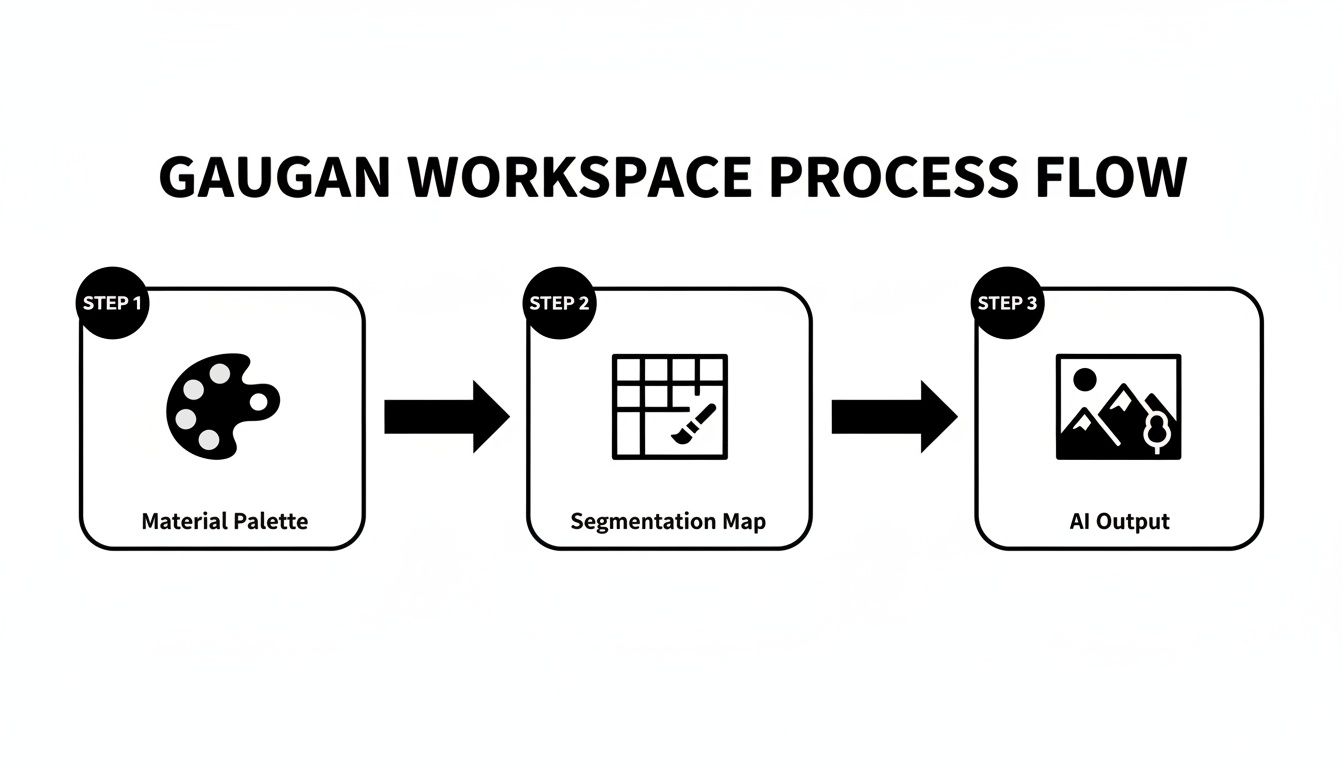
You can see how it is a direct path. Pick your material. Paint it on the map. Watch the AI interpret your idea into a photorealistic image.
Adding Details With the Brush Tool
With our foundational layers in place, it is time to switch over to the brush tool for the finer details. This is where the synergy between the NVIDIA GauGAN fill and brush tools really comes to life.
Select the mountain material. Now, draw a jagged mountain range right along your horizon. Watch how the AI immediately renders it with realistic textures and even adds shadows on the grass below. It understands the physical relationship between these elements.
Next up, let's introduce some water. Choose the river material and paint a winding path from the mountains down through the grassy fields. Do not stress about making it perfect. The AI is surprisingly good at interpreting organic, flowing lines. To finish it off, grab the cloud material and dab a few shapes into your sky.
My go-to tip for creating a convincing sense of depth is to vary your brush size. I use a larger brush for the main mountain forms, then switch to a smaller one for the river and any distant clouds. This simple trick adds a powerful illusion of scale and perspective.
And there you have it. Your first AI-generated landscape is complete. This exercise shows how the core technique in GauGAN is a back-and-forth between broad fills and detailed brushwork. Once you master this basic flow, you will be ready to tackle far more complex compositions.
Advanced Techniques for Realistic Results
Once you have the hang of the basics, you can start pushing NVIDIA GauGAN to create truly impressive work. The jump from simple scenes to compelling digital art comes from understanding how the fill and brush tools can work together to create layers of detail.
The real trick is to combine the tools for complex surfaces. Let's say you want a grassy field dotted with rocks. Do not just paint one or the other. First, use the fill tool to block out the entire area with the grass material. Then, grab the rock brush and start painting scattered formations right on top. The AI is smart enough to blend these elements together. It creates a far more natural-looking landscape than a single material ever could. This is all about adding nuance.
Strategic Material Layering
You have to think in layers. You are not just making a 2D map. You are giving the AI a set of instructions for building a world with real depth and atmosphere.
Take a foggy shoreline, for example. That is not a single material but a deliberate sequence. I always start by filling the sea and sand areas with clean, distinct boundaries. Next, I will switch to the brush and paint in rock formations along the water's edge to add some structure.
The magic happens with the last step. I will select the cloud material and lightly paint over the intersections between the water, sand, and rocks. The AI interprets this as fog rolling in, which instantly adds mood and depth by partially obscuring the scene. If you're looking for more workflows like this, our guides on AI texturing are a great place to continue exploring.
Here’s a counter-intuitive opinion I have found surprisingly effective: try using the 'wrong' material on purpose. Use the road brush with a tiny size to paint a thin line across a large rock formation. More often than not, the AI interprets the hard, linear nature of the 'road' as a geological fissure, adding an incredible, and unexpected, layer of realism.
This kind of creative interpretation is possible because of the sophisticated generative adversarial network (GAN) at GauGAN's core. The research behind it was so groundbreaking that it was accepted as an oral presentation at the 2019 CVPR conference. An honor reserved for only about 5% of submissions.
This advanced neural network is precisely what allows GauGAN to make sense of even abstract inputs. You can read more about the impressive research behind GauGAN to get a better sense of the technology you're working with.
Tips for Blending and Creating Textures
Getting a seamless blend between different materials is what separates a decent AI-generated image from a truly great one. This is where the real artistry comes in, using the NVIDIA GauGAN fill and brush as an extension of your creative intuition.
Anyone can paint a block of sand next to a block of sea, but the result is a hard, unnatural line. The secret to a realistic shoreline is to think in layers. I have found that using a small brush to slightly overlap the edges of the two materials is key. This subtle feathering tells the AI to create that soft, wet-sand transition where the waves lap the beach. The details sell the illusion.
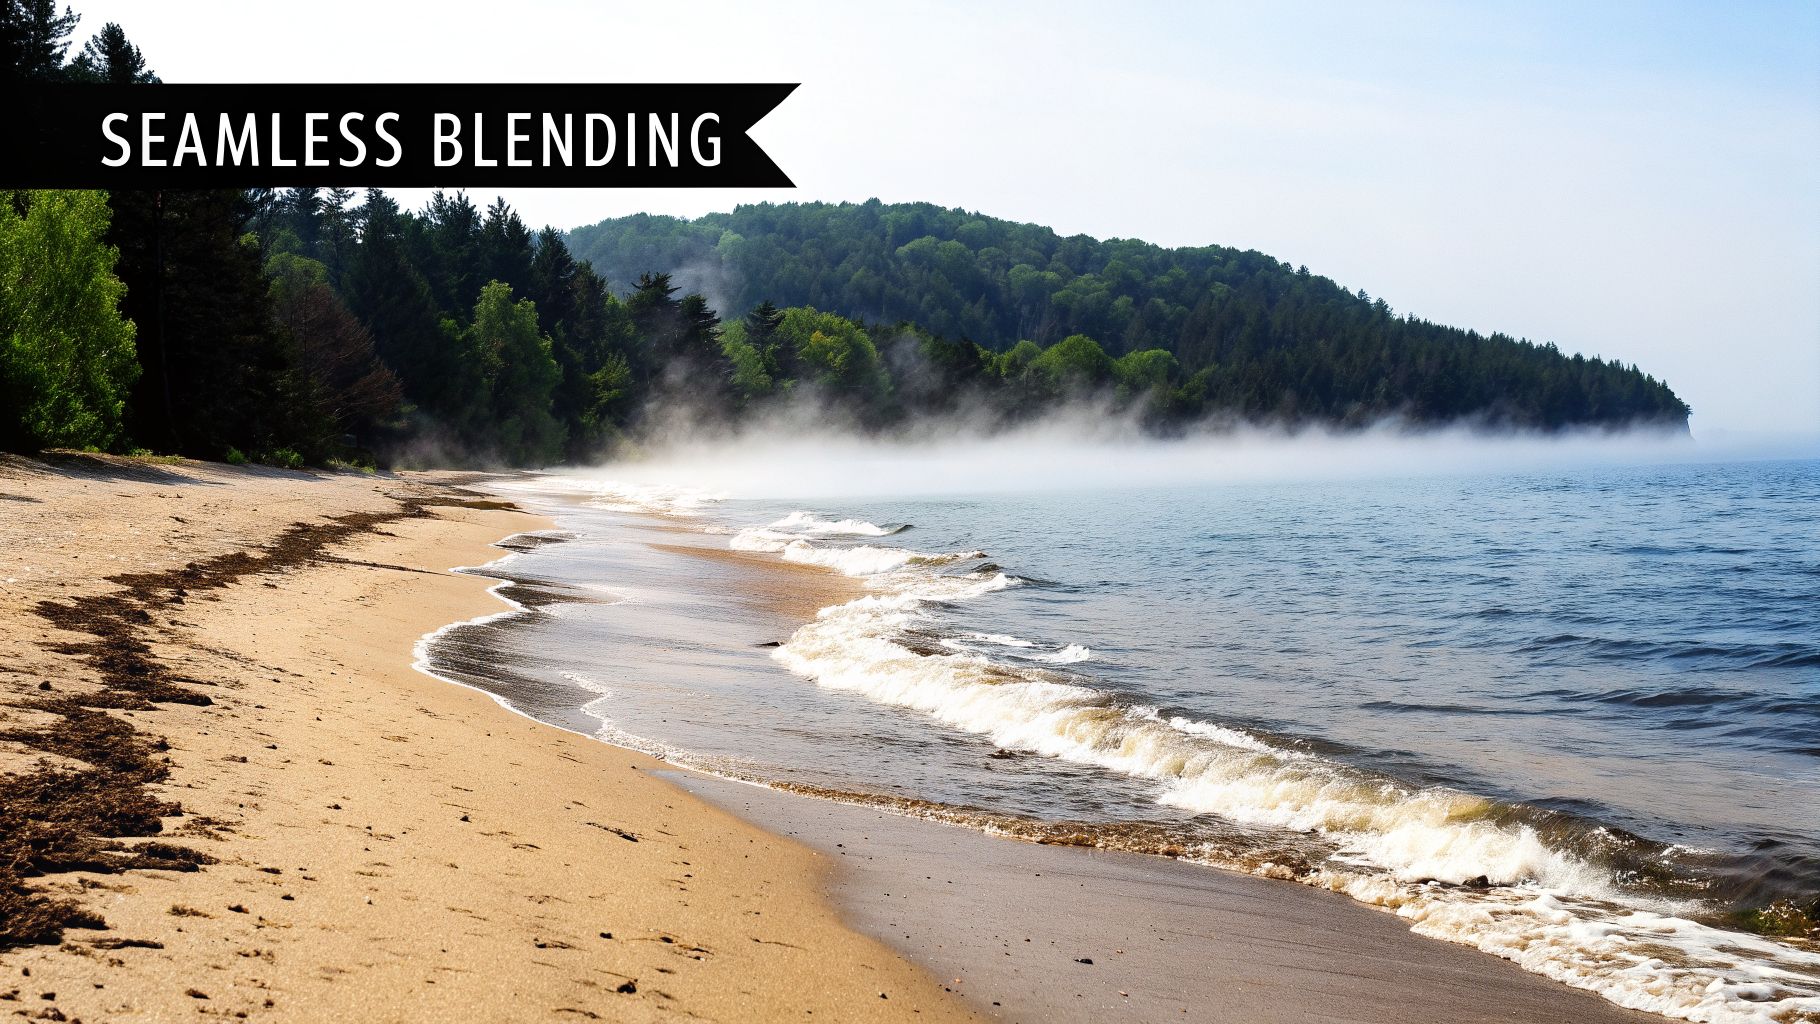
This same logic is perfect for generating incredible atmospheric effects. It is one of my favorite ways to add instant mood and depth to a scene.
Creating Atmospheric Effects
Let’s say I am building a misty forest. I will start by painting the tree material to establish the basic structure. But I do not stop there. The real magic happens when I switch to the cloud material, pick a large, soft brush, and gently paint a thin layer over sections of the trees.
This layering technique is essentially a direct instruction to the AI. It understands that "cloud" over "tree" means fog or mist weaving through the branches, not just a solid object. The result is a scene with a palpable atmosphere that you could never get with a single material.
Ultimately, mastering these little interactions will completely change the quality of your images. Stop thinking of it as just painting shapes and start thinking of it as composing with elements. You are not just telling the AI what to make. You are guiding it on how to make it.
These principles of layering and blending are not just limited to GauGAN. To expand your skills, it is worth exploring broader techniques for image enhancement, as many of the same concepts apply across different creative software. In AI art, small adjustments create the biggest impact.
Troubleshooting Common GauGAN Issues
Sooner or later, every GauGAN user runs into it: a generated image that looks blurry, distorted, or just plain weird. When your beautiful landscape turns into an abstract mess, it is easy to get frustrated. But in my experience, the problem almost always traces back to a single source. Your segmentation map.
A distorted image is usually a sign of "bleeding" materials. This happens when the colored regions on your map overlap or have fuzzy, undefined edges. The AI simply cannot interpret these ambiguous instructions, which leads to muddy, unnatural transitions. Think of a mountain that seems to melt into the sky. That is a classic symptom.
Fixing Segmentation Map Errors
The best solution is to be meticulous from the start. I recommend using a smaller brush size to draw sharp, distinct borders between different materials. Treat it like a coloring book where staying inside the lines is crucial. A clean line separating water from sand tells the AI to create a shoreline, not a murky swamp.
Also, take a second to check your material logic. Did you accidentally paint a building label over a patch of river? While you can get some wild creative effects this way, illogical combinations are a surefire way to confuse the model.
I once lost an hour trying to figure out why my "forest" looked like a pixelated nightmare. It turned out to be a single, stray pixel of the sea material I had accidentally dropped among the trees. The AI was dutifully trying to render a tiny ocean in the middle of a woodland, and the result was pure chaos.
These kinds of mistakes are incredibly common, but thankfully, they are also easy to fix. Just taking a moment to zoom in and meticulously clean up your segmentation map will solve over 90% of the rendering problems you will encounter. That small bit of diligence up front will save you a massive headache later.
For a deeper dive into the hardware that makes these incredible tools possible, you can explore our guide to modern GPUs.
Common Questions About NVIDIA GauGAN
Even the most intuitive tools have a learning curve. As you get comfortable with GauGAN, you are bound to run into a few head-scratchers. Here are some of the most frequent questions I see, along with answers drawn from hands-on experience.
Why does my image look blurry or unrealistic?
If your final image is coming out blurry or just plain weird, the culprit is almost always the segmentation map you painted. The AI can get confused when the boundaries between materials are not clean and distinct. The AI needs clear instructions. A fuzzy, overlapping line between 'water' and 'sand' tells the model to blend them, resulting in a muddy, undefined shoreline. For a crisp edge, you need to use a smaller brush and create a sharp, deliberate border. Precision on the map is everything.
Can I import my own sketches into GauGAN?
The original web-based NVIDIA GauGAN AI Playground was built as a self-contained experience. It does not have a feature for importing external files or sketches. You are meant to paint directly onto its digital canvas from scratch. However, the downloadable app that grew out of this project, NVIDIA Canvas, is a different story. It is a much more robust tool with a layer-based system. While there is no direct "import sketch" button, you can easily use a sketch on a separate screen as a visual guide while you paint on the Canvas segmentation map. This gives you far more control.
What is the difference between NVIDIA GauGAN and Canvas?
GauGAN was the groundbreaking research project and web demo that first showed the world what this kind of AI-powered painting could do. NVIDIA Canvas is the official, full-featured desktop application that requires a Windows machine with an NVIDIA RTX GPU.
Think of GauGAN as the incredible prototype that proved the concept was possible. Canvas is the production-ready tool built from that success, offering more AI models, style options, and the ability to work with layers and export high-resolution images.
How do I get sharper lines and details?
Achieving sharp, defined details comes down to your brushwork on the segmentation map. It is a direct translation. Clean inputs create clean outputs. To get a crisp mountain ridge against the sky, you absolutely must use the smallest brush size possible to draw that dividing line. A single, thin pixel border between 'mountain' and 'sky' is the clearest instruction you can give the AI. Using a larger brush or smudging the edges will intentionally produce a softer, more blended transition.
Finding the right AI tool in a crowded market can be tough. Oryndex is a discovery engine I find really useful; it's a curated directory that cuts through the noise. If you're looking to build out your AI toolkit, you can explore their library at https://toolibrary.co.